SOLAR PANELS
Solar Panel
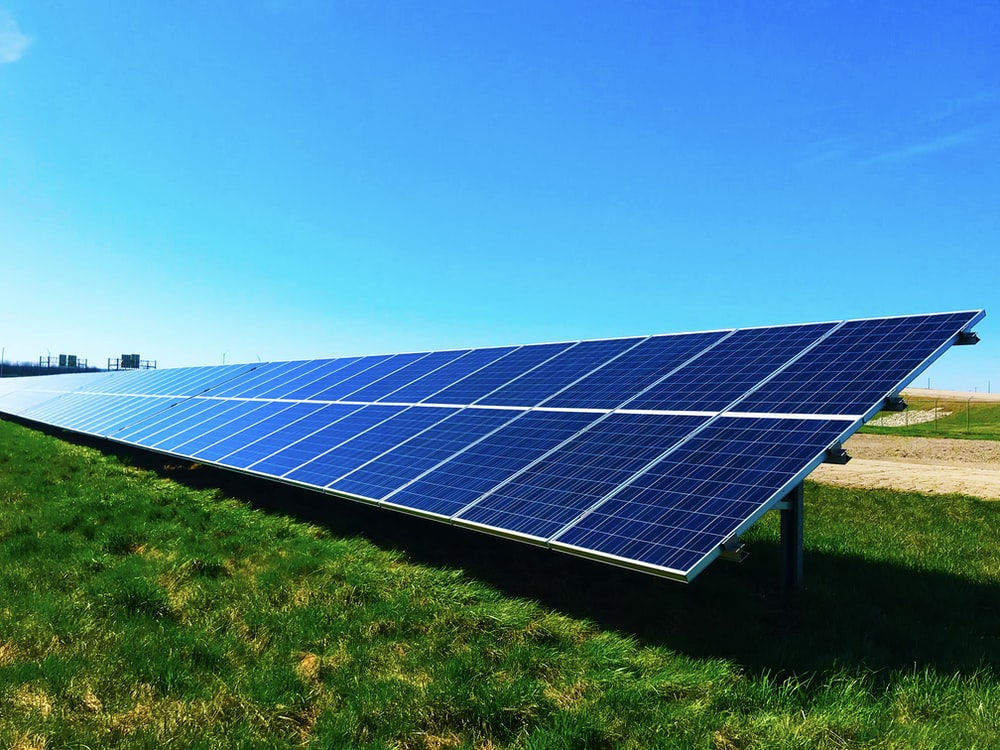
Introduction to Solar Panel
The term solar panel is used colloquially for a photovoltaic board. The PV module is an assembly of photovoltaic cells mounted in the installation framework. Photovoltaic cells use sunlight as a source of energy to produce direct electricity. A set of PV modules is called a PV panel and a panel system is called an array.

Solar Panel Installation
Step 1: Find the Best Location
First, you should survey your property to identify the best place to install the panels. Remember, just because the sun hits an area of your rooftop or property doesn’t mean it’s the best spot. The pitch and direction of the roof affect the efficiency of the solar modules. Therefore, make sure you pick a location that will give the panels maximum exposure to the sun for most of the day.
Step 2: Build the Platform
Step two involves preparing the area for the placing of the modules. You can construct the platform using metal or aluminum rails. Design the mounting system with the length and width of the panels in mind. Make sure it is strong enough so that it can withstand extreme weather. Building a platform requires that you run conduits from the point of installation to inside the house, where the generated power will be processed.
Step 3: Mount the Panels
The panels are mounted on the platform using brackets, bolts or clamps. The role of the accessories is to ensure that the modules are held firmly on the platform. Be careful when installing panels on the roof to avoid accidents and damages.

Step 4: Wiring
You will need to wire the solar modules together using junction connectors or a fuse combiner box. Make sure that the cables are well insulated to avoid power leakage and accidents. Once completed, connect the exterior wiring with the interior control panels.
The connection will allow energy to flow from the disconnect to a charge controller and battery bank for storage. Alternatively, it can flow from the disconnect to an inverter. Whether power will first flow into the charge controller or the inverter will depend on the type of solar power system in place. The wiring stage is crucial. That is why you should not carry out solar panels installation if you are not a qualified technician. Instead, hire professionals who have experience with wiring to avoid injury or damage to the system.
Step 5: Ground the Panels and the Mounting System
Earthing the solar panels and the mounting system is crucial in the installation of panels. It will:
- Protect you and others from electric shock, which can be fatal
- Offer protection against fire that can be caused by the system
- Protect solar component against lightning since it causes a power surge
That is why you need to make sure the installation has grounding rods that should remain six inches above the ground. The mounting system consists of metal and that is why it should be earthed. The control panel inside the house must also be grounded if there is no earthing network already in place.
Step 6: Connect the Electrical Components
The next step is to connect the electrical components properly. Since the wiring, determined by the type of solar system is already in place, fitting the parts should not be a challenge. If the system has a battery backup, the number of components will be many. In this case, make sure connections between the panels, charge controller, battery and the inverter are all correct. You can then direct the power from the inverter to the main electrical control panel of the house.
Step 7: The Test Run
Everything should be looked over once more before initializing a test run. The purpose of the test run is to ensure that everything is working correctly. Once complete, it’s time to close the book and start reaping the benefits of solar photovoltaic power.
How does the Solar Photovoltaic System Work?
After you’ve installed solar panels, you should already be harnessing power from the most prevalent natural resource. But how does that work?
Once installed, solar panels absorb the sun’s energy, which they use to generate DC electricity. You can then store the produced power in storage batteries for use with DC devices. Alternatively, the produced power can be converted to AC directly from the panels or the battery bank. You can then use it to run the many home appliances that operate exclusively on AC electricity.
Benefits of Installing Solar Panels
There are several reasons why having a solar power system is a wise decision.
First, solar energy benefits the environment since it is clean, renewable and sustainable.
Secondly, you are investing in a renewable, sustainable and easy-to-access energy resource that you can commodify to promote economic stability. For example, you can decide to sell excess electricity to the grid. By doing so, you will ensure the continuous availability of electrical power while also earning. Finally, solar panels present a viable way to avoid the high and rising costs of traditional energy sources. With solar power, you don’t have to rely on the power from the grid, which can be expensive.
Conclusion
If you don’t have a solar system in place, it is time you invested in one. Use the steps provided on how to install solar panels yourself. However, if it is a large project, make sure you hire qualified technicians for the best residential solar power system.

Residential solar panels can reduce your monthly energy costs, but there’s more to it than that. Solar energy is an investment. To show you the true value of solar, we had our experts compile a list of the top 4 reasons why solar panels are worth it. Keep reading to learn why residential solar panels are worth the money and how you can get started today.
4 Reasons Solar Panels Are Worth the Cost
Residential solar panels could potentially offer both immediate and long-term savings. Discover the top 4 reasons why residential solar energy is worth the investment below.
1. Solar panels could potentially lower your electric bills
Powering your home with solar energy can reduce your electric bills. However, the price of solar can vary from home to home. Things like monthly energy costs and rates of your current utility company factor into determining how many solar panels you’ll need to save money. Generally speaking, the more power your home uses, the more solar panels that will be required to see significant savings.
2. You take steps to own your power, not just rent it

Given the financial uncertainty of 2020, owning your power is more valuable than ever before. Going solar gives you that opportunity, as the energy your solar panels produce will be owned by you. Utility companies can’t charge you for power you didn’t get from them and that provides some protection against bearing the full brunt of their rate increases. Better yet, when your solar panels are paid off, that energy is completely free to you. Furthermore, if you add a Generac battery and/or generator to your solar panel system, you’ll have protection against unexpected outages because you won’t need to rely solely on the electric grid for power. Simply put, solar panels don’t just potentially save you money – they can help protect yourself and your loved ones.
3. You can offset future electric bills with net metering
Net metering is a billing system that credits you for the amount of solar power you add to the grid. Here’s how it works: Residential solar panel systems can generate more power than the home consumes during the day. Net metering allows homeowners to send that excess power back to the grid in exchange for credit on future energy bills. This is particularly beneficial at night time when your home is still using power but your panels are producing less energy or no energy at all. Note that not all utilities offer net metering credits. Consult your local utility company to see if net metering is available in your area.
4. Home solar panels could potentially raise your property value
Because solar panels could potentially reduce the amount you pay for power each month, it’s reasonable to expect that others may find your home more attractive should you ever sell it. If you have two houses that are exactly the same, but only one of them has solar panels, wouldn’t you choose the one with solar, given the fact you could potentially save money on your electric bill?

Types of Solar Panels
There are three major types of solar panels: monocrystalline, polycrystalline and thin-film. Each type has its own unique advantages and disadvantages and the solar panel type best suited for your installation will depend on factors specific to your own property and desired system characteristics.

Both monocrystalline and polycrystalline solar panels have cells made of silicon wafers. To build a monocrystalline or polycrystalline panel, wafers are assembled into rows and columns to form a rectangle, covered with a glass sheet and framed together.
While both of these types of solar panels have cells made from silicon, monocrystalline and polycrystalline panels vary in the composition of the silicon itself. Monocrystalline solar cells are cut from a single, pure crystal of silicon. Alternatively, polycrystalline solar cells are composed of fragments of silicon crystals that are melted together in a mold before being cut into wafers.

Unlike monocrystalline and polycrystalline solar panels, thin-film panels are made from different materials. The most prevalent type of thin-film solar panel is made from cadmium telluride (CdTe). To make this type of thin-film panel, manufacturers place a layer of CdTe between transparent conducting layers that help capture sunlight. This type of thin-film technology also has a glass layer on the top for protection.
Thin-film solar panels can also be made from amorphous silicon (a-Si), which is similar to the composition of monocrystalline and polycrystalline panels. Though these thin-film panels use silicon in their composition, they are not made up of solid silicon wafers. Rather, they’re composed of non-crystalline silicon placed on top of glass, plastic or metal.
Lastly, Copper Indium Gallium Selenide (CIGS) panels are another popular type of thin-film technology. CIGS panels have all four elements placed between two conductive layers (i.e. glass, plastic, aluminum, or steel) and electrodes are placed on the front and the back of the material to capture electrical currents.